Introduction
The Copenhagen plank exercise is a powerful core movement that targets the inner thighs, hips, and abdominal muscles. It is especially useful for people who want to improve core stability, hip strength, and lower-body control without using gym equipment. Unlike a traditional side plank, this exercise places extra demand on the adductor muscles while your body works to stay stable. The Copenhagen plank exercise can be performed in different ways, making it suitable for beginners and more advanced athletes. In this complete guide, you will learn how to perform it correctly, understand its benefits, avoid common mistakes, choose the right variation, and add it safely to your workout routine.
What Is the Copenhagen Plank Exercise?
The Copenhagen plank is a bodyweight core exercise that combines side-plank stability with an active inner-thigh contraction. During the movement, one leg is supported on a bench, box, or other stable surface while the other leg remains below it. You lift your hips and hold your body in a straight line.
The main muscles involved are the adductors, which are the muscles located on the inside of your thighs. Your obliques, abdominal muscles, glutes, hip muscles, and shoulders also work to keep your body stable.
Because the movement requires several muscle groups to work together, it can be a useful addition to strength training, sports conditioning, and core workouts.
Muscles Worked by the Copenhagen Plank
The Copenhagen plank is more than a simple abdominal exercise. It challenges the muscles responsible for controlling your pelvis, hips, and trunk.
1. Adductor Muscles
The adductors are the primary muscles challenged during this exercise. They help bring your leg toward the center of your body and contribute to hip stability.
Because the top leg is supported while you hold your body off the floor, the inner thigh must work hard to maintain the position. This makes the Copenhagen plank particularly useful for developing adductor strength.
2. Obliques
Your internal and external obliques help prevent your torso from rotating or collapsing toward the floor. They are important for maintaining a strong side-plank position.
3. Core Muscles
Your deep abdominal muscles and other core muscles help stabilize your spine and pelvis. Keeping your stomach gently braced throughout the exercise can make the movement more controlled.
4. Glutes
Your glute muscles help maintain hip extension and prevent your hips from dropping. Strong glutes can also contribute to better control during single-leg and lateral movements.
5. Hip Stabilizers
The muscles around your hips must work together to keep your pelvis in a stable position. This can make the exercise useful for people who want stronger and more controlled hip movement.
6. Shoulders and Upper Body
Your supporting arm and shoulder help hold your upper body away from the floor. Your shoulder muscles need to remain active so that your torso stays elevated.
How to Do a Copenhagen Plank Correctly
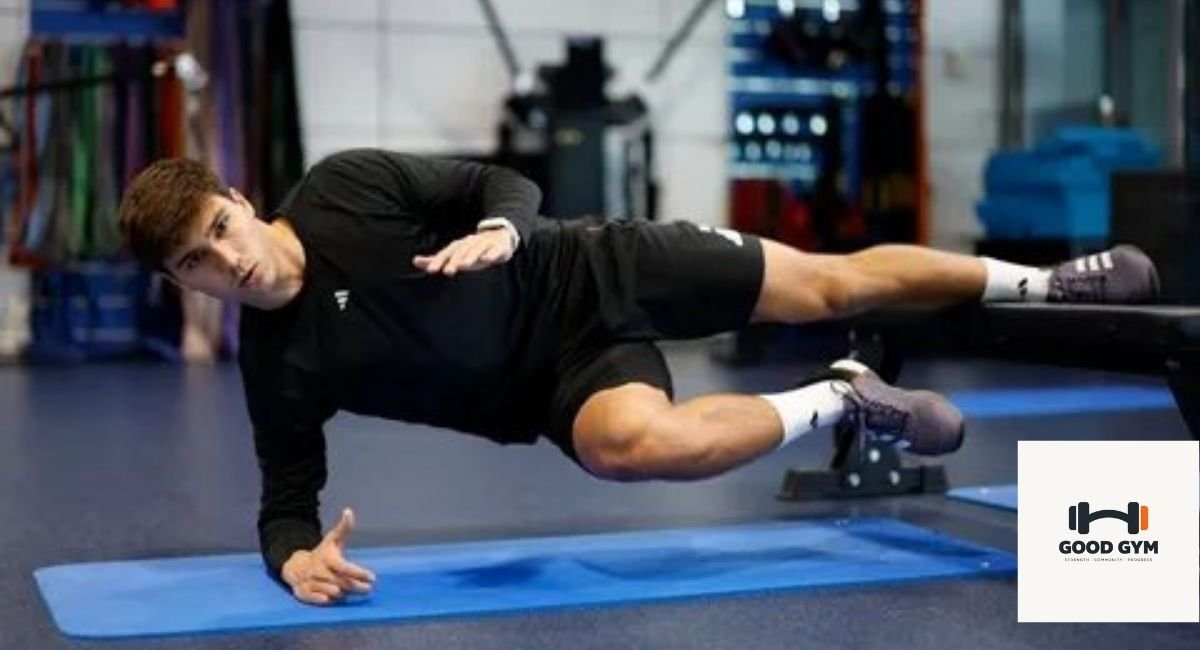
Learning the proper Copenhagen plank form is important because the movement places significant demand on the inner thigh and core muscles. Beginners should start with an easier variation before attempting the full version.
Step 1: Choose a Stable Surface
Place a sturdy bench, exercise box, or similar stable surface beside you. The surface should not move when you place your leg on it.
Step 2: Set Up Your Body
Lie on your side next to the bench. Place your upper leg on the bench. Your lower leg should remain underneath the bench or slightly away from it.
Step 3: Position Your Supporting Arm
Place your elbow or hand directly under your shoulder. Keep your shoulder controlled rather than allowing it to collapse toward the floor.
Step 4: Lift Your Hips
Press your supporting arm into the floor and squeeze the muscles of your upper leg against the bench. Lift your hips away from the floor.
Step 5: Create a Straight Line
Try to keep your head, shoulders, hips, and lower body aligned. Avoid bending forward or allowing your hips to rotate.
Step 6: Hold the Position
Maintain the position while breathing normally. Start with a short hold rather than trying to stay up for a long time.
Step 7: Lower With Control
Slowly lower your hips back toward the floor. Rest briefly before repeating the movement or switching sides.
Why Proper Form Matters
Good technique allows you to place the training stress on the intended muscles. If your hips rotate, your body bends, or your shoulder position becomes unstable, the exercise may become less effective and more difficult to control.
Focus on quality rather than duration. A controlled 10-second hold with good alignment is usually more useful than a long hold performed with poor technique.
Beginner Copenhagen Plank Variation
The full Copenhagen plank can be challenging for beginners. A modified version allows you to learn the movement while reducing the amount of load placed on the inner thigh.
For a beginner variation, support a larger portion of your lower leg on the bench instead of placing only the foot or ankle on the surface. This gives you more support and makes the movement easier to control.
Start with 2 to 3 sets of 10 to 20 seconds per side. If this feels difficult, reduce the holding time and focus on maintaining proper alignment.
Copenhagen Plank vs. Side Plank
Both exercises challenge the core, but they place different demands on the body.
A traditional side plank mainly focuses on lateral core stability. The Copenhagen plank adds a strong inner-thigh component because the upper leg actively supports the body.
This means the Copenhagen plank can be a useful progression for people who already perform standard side planks and want to challenge their adductors and hip stabilizers.
| Exercise | Main Focus | Difficulty |
|---|---|---|
| Side Plank | Core and obliques | Beginner to advanced |
| Modified Copenhagen Plank | Core and inner thighs | Beginner to intermediate |
| Full Copenhagen Plank | Adductors, core, and hip stability | Intermediate to advanced |
Key Benefits of the Copenhagen Plank
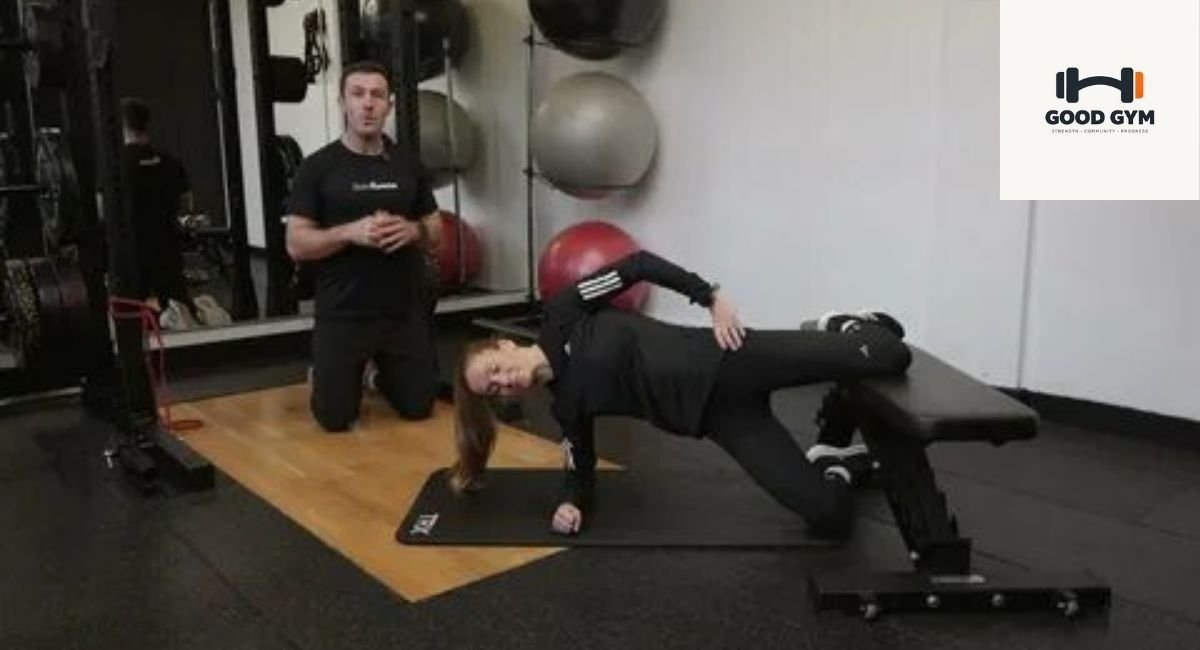
Adding this exercise to a balanced training program can provide several useful benefits.
Improves Inner-Thigh Strength
One of the biggest advantages is its ability to challenge the adductor muscles. Strong inner thighs can contribute to better control during running, jumping, changing direction, and other lower-body movements.
Builds Core Stability
The exercise requires your abdominal and side-body muscles to resist movement. This makes it a useful core stability exercise rather than simply an abdominal isolation movement.
Supports Hip Stability
Your hip muscles work together to keep your pelvis positioned correctly. Regular strength training for these muscles may help improve control during many athletic and everyday movements.
Challenges the Body Without Weights
You do not need dumbbells, barbells, or machines to perform the Copenhagen plank. A stable elevated surface is usually enough.
Useful for Athletes
Sports that involve running, cutting, jumping, or rapid changes in direction require strong and controlled hips and inner thighs. For this reason, the exercise is often included in athletic conditioning programs.
Improves Lateral Core Control
The side position challenges your ability to keep the trunk stable. This can complement exercises such as regular planks, dead bugs, bird dogs, and other core stability movements.
How to Progress the Copenhagen Plank
Progressing the Copenhagen plank should be gradual. You do not need to jump from a beginner variation directly into the hardest version. Instead, increase the challenge when you can maintain good posture, steady breathing, and controlled movement.
1. Increase the Hold Time
Start with short holds of around 10 to 15 seconds per side. As your strength improves, gradually increase the duration to 20, 30, or even 40 seconds.
Longer holds are not always better. Your main goal should be maintaining proper alignment while keeping your muscles active. If your hips begin to drop or your body starts rotating, end the set.
2. Use Less Leg Support
A simple way to make the movement harder is to reduce the amount of your upper leg that rests on the bench. Supporting the leg closer to the ankle increases the demand on the inner thigh and core.
3. Use a Higher Surface
A higher bench can change the position of your body and may increase the challenge. However, beginners should not use a high surface simply to make the exercise harder. Choose a height that allows you to maintain control.
4. Add Controlled Leg Movement
Once you are comfortable with a static Copenhagen plank, you can experiment with controlled movement. For example, you may slowly lower and raise the unsupported leg while keeping your hips elevated.
This variation requires additional control and should only be attempted after you have mastered the basic position.
5. Try the Full Copenhagen Plank
The full version places greater emphasis on the adductors and requires strong core control. Your upper leg remains supported while the rest of your body stays elevated.
Move into the full version gradually. If you cannot maintain a straight body position, return to a modified variation.
Copenhagen Plank Variations
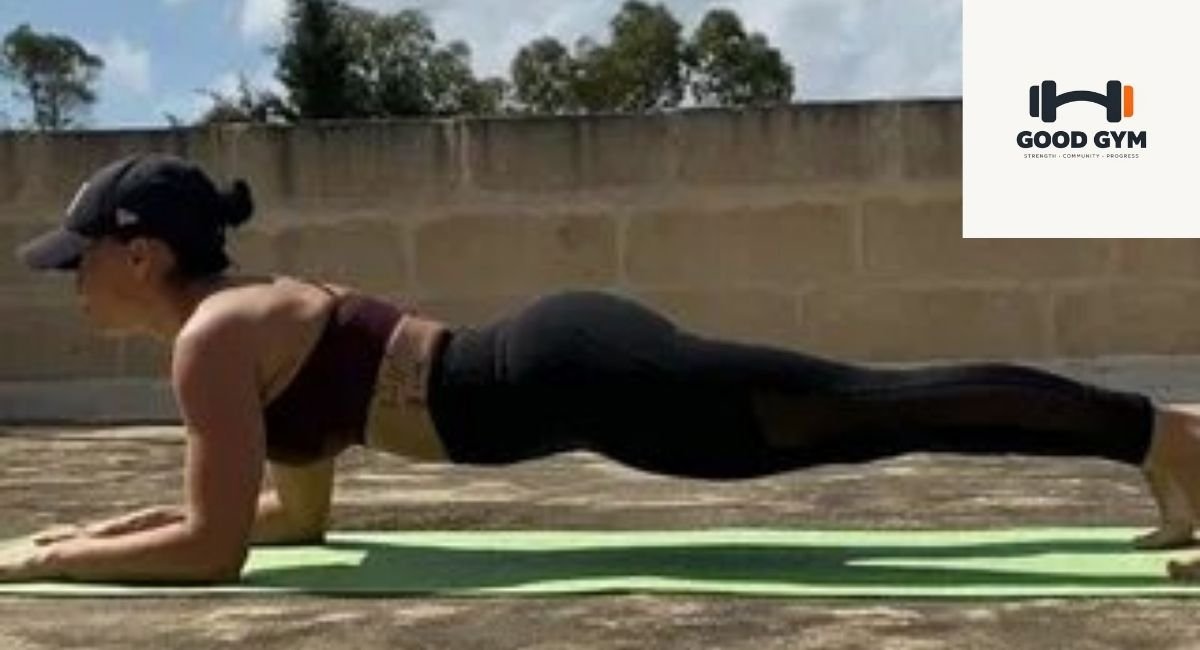
Different Copenhagen plank variations allow you to adjust the exercise according to your strength and experience. Using the right variation is more important than trying to perform the most difficult version immediately.
Short-Lever Copenhagen Plank
The short-lever variation is one of the easiest ways to begin. Instead of supporting the upper leg near the ankle, you place more of the lower leg on the bench.
This reduces the lever length and makes the exercise more manageable. It is a good option for beginners who are learning how to activate their inner thighs.
Long-Lever Copenhagen Plank
In the long-lever version, the upper leg is supported closer to the ankle or foot. This increases the leverage and makes the adductor muscles work harder.
Because the movement is more demanding, you should only use this version when you can perform the short-lever variation with good form.
Forearm Copenhagen Plank
The forearm variation uses your elbow and forearm as the main upper-body support. Keep your elbow underneath your shoulder and maintain a strong trunk position.
This version can feel more stable for some people because the forearm provides a larger contact area with the floor.
High Copenhagen Plank
In the high Copenhagen plank, you support your upper body with your hand instead of your forearm. Keep your arm straight and your hand underneath your shoulder.
This variation also challenges the shoulder and upper-body muscles while your core and inner thigh maintain the plank position.
Copenhagen Plank With Leg Lift
The leg-lift variation adds movement to the lower leg. While keeping the supported leg stable, slowly lift the free leg and lower it again.
Use a slow tempo and avoid swinging the leg. The goal is controlled movement rather than speed.
Dynamic Copenhagen Plank
A dynamic version involves moving the hips while maintaining control of the supported leg. This increases the movement component and can make the exercise more challenging.
Dynamic variations should be introduced only after you can perform static holds comfortably.
How Long Should You Hold a Copenhagen Plank?
The ideal hold time depends on your fitness level and the variation you are performing. Beginners can start with short sets, while experienced athletes may be able to hold the position for longer.
| Fitness Level | Suggested Hold | Sets |
|---|---|---|
| Beginner | 10–15 seconds | 2 sets per side |
| Intermediate | 15–30 seconds | 2–3 sets per side |
| Advanced | 30–45 seconds | 3 sets per side |
These are general guidelines rather than strict requirements. Your ability to maintain good form should determine when you increase the duration.
How Many Copenhagen Planks Should You Do?
For most people, two or three sets per side are enough for a training session. You can include the exercise two or three times per week depending on your overall workout routine.
If you are new to adductor training, start with fewer sets and shorter holds. Your inner thighs may become tired quickly because they are working in a position they may not be accustomed to.
As your strength improves, you can gradually increase the number of sets, holding time, or exercise difficulty.
Copenhagen Plank Workout for Beginners
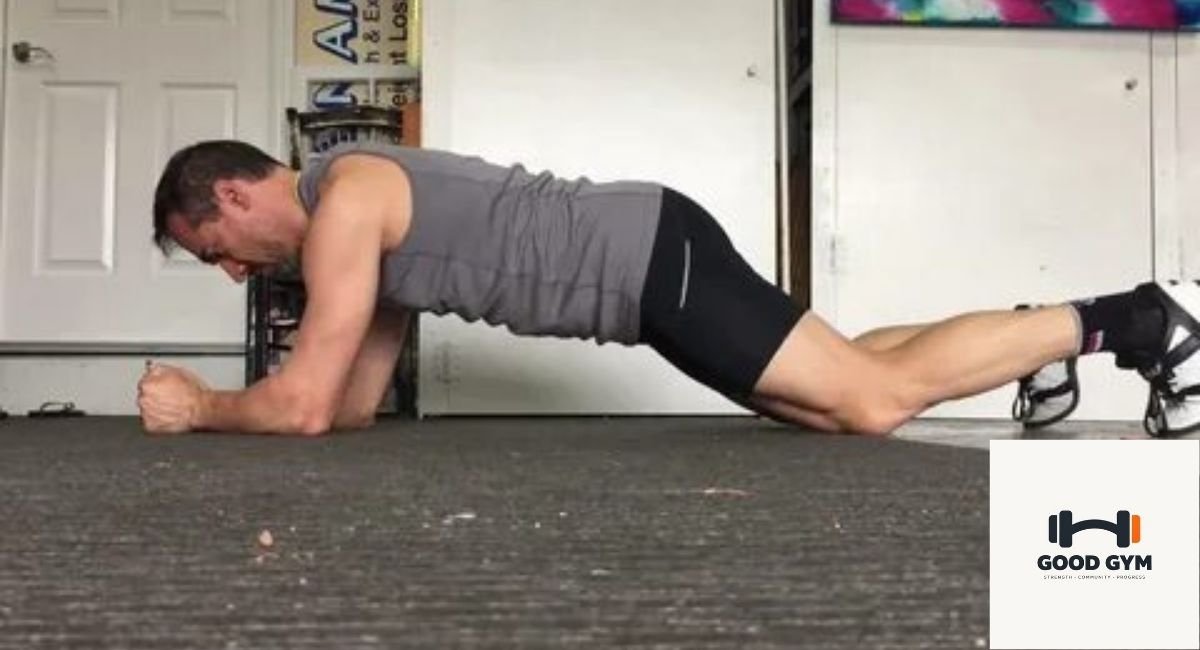
A simple beginner routine can help you build the strength needed for more difficult variations. The following workout focuses on controlled movements rather than maximum effort.
Beginner Routine
- Modified Copenhagen plank: 2 sets of 10–15 seconds per side
- Glute bridge: 2 sets of 12 repetitions
- Dead bug: 2 sets of 8–10 repetitions per side
- Bird dog: 2 sets of 8 repetitions per side
- Bodyweight squat: 2 sets of 10 repetitions
Rest for around 30 to 60 seconds between sets. If the Copenhagen plank causes excessive fatigue in your inner thighs, reduce the hold time.
Intermediate Copenhagen Plank Workout
Once you can comfortably perform the beginner variation, you can increase the challenge by using a longer lever and combining the exercise with other core movements.
Example Routine
- Full Copenhagen plank: 3 sets of 15–25 seconds per side
- Side plank: 3 sets of 20 seconds per side
- Reverse lunge: 3 sets of 10 repetitions per leg
- Single-leg glute bridge: 3 sets of 8–10 repetitions per side
- Dead bug: 3 sets of 10 repetitions per side
Perform the exercises with controlled technique. You do not need to move quickly to make this workout effective.
How to Add Copenhagen Planks to Your Workout
The Copenhagen plank can be used as part of a core workout, lower-body workout, athletic conditioning session, or warm-up routine.
During a Core Workout
Pair it with exercises that challenge different areas of your core. Dead bugs, bird dogs, front planks, and controlled side planks can complement the inner-thigh focus of the Copenhagen plank.
During a Lower-Body Workout
You can perform Copenhagen planks before or after exercises such as squats, lunges, step-ups, and glute bridges. If you perform them before heavy lower-body training, keep the sets short so that your inner thighs do not become overly fatigued.
For Sports Conditioning
Athletes can include Copenhagen planks in a broader program that includes running, jumping, strength exercises, balance training, and change-of-direction drills.
Common Copenhagen Plank Mistakes
Even though the exercise looks simple, several technique mistakes can reduce its effectiveness.
Letting the Hips Drop
One of the most common mistakes is allowing the hips to move toward the floor. This reduces the quality of the plank and can make it harder to maintain the intended position.
Think about keeping your hips lifted and your body in one long line.
Rotating the Torso
Your shoulders and hips should remain stacked. Avoid turning your chest toward the floor or ceiling.
Holding Your Breath
Some people automatically hold their breath during difficult isometric exercises. Try to breathe slowly and steadily while maintaining abdominal tension.
Using a Moving Bench
The surface supporting your leg must be stable. A bench that slides or rocks can make the exercise unsafe and prevent you from focusing on proper technique.
Starting With the Hardest Variation
Trying the most advanced Copenhagen plank immediately is unnecessary. Start with a variation that you can control and progress gradually.
Doing Too Many Repetitions
The Copenhagen plank is primarily an isometric exercise, so quality matters more than a high number of repetitions. When using dynamic variations, keep every movement slow and controlled.
Copenhagen Plank Exercise Safety Tips
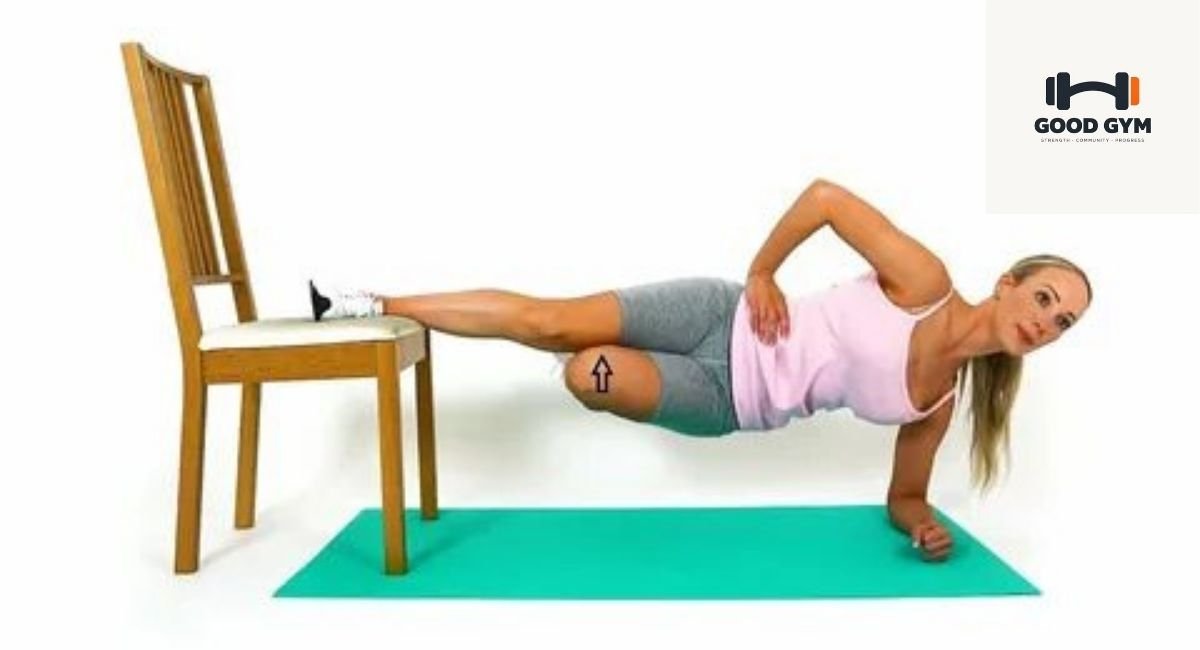
The Copenhagen plank is a demanding exercise for the inner thighs, hips, and core. Using the correct setup and progression can help you train more comfortably. Always use a stable bench or platform that can safely support your body weight.
Start with an easier variation if you are new to adductor training. Keep the movement controlled and stop the set when you can no longer maintain good alignment. Muscle fatigue is normal, but sharp, sudden, or unusual pain is a reason to stop.
Warm Up Before Training
A short warm-up can prepare your body for exercise. Try five to ten minutes of light activity followed by controlled hip movements, bodyweight squats, walking lunges, and gentle dynamic movements.
The purpose of a warm-up is to gradually increase activity and prepare your muscles for the upcoming workout. You do not need an extremely long warm-up before performing a short Copenhagen plank session.
Use a Stable Bench
Check the bench before starting. It should remain firmly in place when you put your leg on it. Avoid unstable chairs, slippery furniture, or surfaces that could move during the exercise.
Start With Short Holds
Beginners should not worry about holding the Copenhagen plank for a long time. A controlled 10-second hold can be enough to begin learning the movement.
Increase the duration slowly as your strength and confidence improve.
Train Both Sides
The Copenhagen plank is a unilateral exercise, which means one side of your body works at a time. Complete your sets on both sides to develop balanced strength and control.
Who Can Benefit From Copenhagen Planks?
The exercise can be useful for a wide range of active people. It is particularly helpful for anyone looking to strengthen the inner thighs and improve lateral core stability.
People New to Core Training
Beginners can use the modified version to develop basic core and adductor strength. The exercise can be progressed gradually as technique improves.
Strength Training Enthusiasts
People who already perform squats, deadlifts, lunges, and other compound exercises can use Copenhagen planks to add focused work for the adductors and lateral core.
Runners
Running requires the hips and legs to repeatedly control body movement. Strengthening supporting muscles can complement a well-rounded running program.
Field and Court Athletes
Activities such as soccer, basketball, tennis, and other sports involve lateral movement and changes of direction. Strong adductors and good trunk control are valuable components of athletic conditioning.
Copenhagen Plank for Athletes
Athletes often need more than basic forward-and-back strength. They also need the ability to control the body from side to side. This is where lateral core exercises and adductor strengthening can be useful.
The Copenhagen plank combines these demands in one movement. The athlete must stabilize the trunk while the inner thigh supports the body.
Why Adductor Strength Matters
The adductor muscles contribute to hip movement and stabilization. They are involved when the legs move toward the center of the body and can also help control the lower limb during athletic movements.
For athletes, strengthening the adductors should be part of a broader program rather than the only form of lower-body conditioning.
Use It With Other Exercises
A balanced athletic program may include squats, split squats, lunges, calf exercises, hamstring exercises, glute exercises, sprint drills, balance work, and core stability exercises.
The Copenhagen plank can complement these movements by providing a focused challenge for the inner thigh and side-body muscles.
Copenhagen Plank for Core Strength
The core is responsible for helping the body maintain control while the arms and legs move. The Copenhagen plank challenges this ability by placing the body in a side-supported position.
Your abdominal muscles and obliques work to keep the torso from rotating. At the same time, the hips and adductors help maintain the lower-body position.
Core Stability vs. Core Movement
Many abdominal exercises involve moving the trunk. The Copenhagen plank is different because it mainly trains your ability to resist unwanted movement.
This type of training is often called anti-movement core training. Your muscles work to keep the spine and pelvis controlled while external forces try to change your position.
Copenhagen Plank for Inner Thigh Strength
The inner thigh muscles can be overlooked in many traditional workouts. Squats and lunges involve the adductors, but the Copenhagen plank provides a more direct challenge.
The supported upper leg must remain connected to the bench while your body stays elevated. This creates a strong isometric demand on the adductor muscles.
Isometric Adductor Training
An isometric exercise involves producing muscle tension while the joint position remains relatively still. During a Copenhagen plank hold, the adductors contract to help maintain the position.
Isometric training can be useful when included appropriately within a broader strength program.
How to Breathe During a Copenhagen Plank
Breathing is an important part of maintaining good exercise technique. Avoid holding your breath throughout the entire set.
Before lifting your hips, take a controlled breath and gently brace your abdominal muscles. During the hold, continue taking slow breaths while keeping your trunk stable.
If you find it difficult to breathe normally, the variation may currently be too challenging. Try a shorter hold or return to the modified version.
How to Improve Your Copenhagen Plank Form
Small adjustments can make a major difference in exercise quality. Focus on alignment instead of simply trying to stay elevated for as long as possible.
Keep Your Head Neutral
Your head should remain in a comfortable position rather than dropping toward the floor or lifting excessively. Look forward or slightly downward according to the variation you are performing.
Stack Your Shoulders
Try to keep your shoulders positioned over one another. This helps maintain a controlled side-plank position.
Keep Your Hips Elevated
Think about pushing your hips forward and upward. Avoid allowing your pelvis to sag toward the floor.
Engage Your Abdominals
Gently brace your abdominal muscles before lifting your body. You should feel your trunk working without excessively tightening your entire body.
Squeeze the Supported Leg
Actively press the supported leg into the bench. This helps create tension through the inner thigh and gives you a stronger connection with the supporting surface.
When Should You Do Copenhagen Planks?
The best time depends on your workout goals. You can use the exercise during a warm-up, strength workout, core session, or conditioning routine.
Before a Workout
Short, easy sets can be used as part of a movement preparation routine. Keep the intensity moderate so your inner thighs do not become fatigued before heavier exercises.
After Strength Training
You can perform Copenhagen planks after your main lower-body exercises. This allows you to focus on accessory strength without affecting your major lifts.
During a Core Session
The exercise fits naturally into a core workout alongside side planks, dead bugs, bird dogs, reverse crunches, and other stability movements.
How Often Should You Perform Copenhagen Planks?
For many people, two or three sessions per week are enough. The exact frequency depends on your training experience, workout volume, and recovery.
If your inner thighs remain very sore after a session, give them more recovery time before increasing the workload.
Consistency is more important than performing the exercise every day. A gradual progression can help you build strength without unnecessarily increasing training stress.
Copenhagen Plank and Other Core Exercises
The Copenhagen plank should not replace every other core exercise. A strong core program can include movements that challenge stability, flexion, extension, rotation, and anti-rotation.
Dead Bug
The dead bug trains controlled movement of the arms and legs while maintaining trunk stability. It is a useful beginner-friendly complement to the Copenhagen plank.
Bird Dog
The bird dog challenges balance and coordination while the opposite arm and leg move. It can help create variety in a core workout.
Side Plank
The traditional side plank directly trains lateral core stability. You can use it before progressing to more demanding Copenhagen plank variations.
Front Plank
The front plank focuses on maintaining a stable trunk against gravity. Combining front and side-oriented exercises can create a more balanced core routine.
Copenhagen Plank Progression Plan
A simple progression can help you move from basic support to more advanced variations.
| Stage | Variation | Suggested Hold |
|---|---|---|
| Stage 1 | Modified Copenhagen plank | 10–15 seconds |
| Stage 2 | Modified Copenhagen plank | 20–30 seconds |
| Stage 3 | Full Copenhagen plank | 10–20 seconds |
| Stage 4 | Full Copenhagen plank | 20–30 seconds |
| Stage 5 | Dynamic variation | Controlled repetitions |
Do not rush through the stages. Move forward when you can maintain consistent technique on both sides.
What to Do If the Copenhagen Plank Feels Too Difficult
If the exercise feels extremely difficult, reduce the challenge rather than forcing the full version. Use a lower lever, support more of your leg on the bench, or shorten the hold.
You can also practice traditional side planks and basic adductor-strengthening exercises before returning to the Copenhagen plank.
Remember that difficulty is not a sign that you need to use poor form. A simpler variation performed correctly can be more productive than an advanced variation performed incorrectly.
Copenhagen Plank Exercise: Common Questions
Is the Copenhagen Plank Good for Beginners?
Yes, beginners can perform the Copenhagen plank when they start with a modified variation. The full version can be demanding because it places significant tension on the inner thigh and requires good core stability.
A beginner can place more of the lower leg on the bench to reduce the lever length. Start with short holds and focus on keeping the shoulders, hips, and legs aligned.
As your strength improves, you can gradually reduce the amount of support and increase the holding time. There is no need to rush toward the advanced version.
Does the Copenhagen Plank Build Abs?
The Copenhagen plank works your core muscles, including the obliques and deeper abdominal muscles. However, it should not be considered a complete abdominal workout by itself.
If your goal is stronger and more functional core muscles, combine Copenhagen planks with exercises such as dead bugs, front planks, bird dogs, reverse crunches, and controlled anti-rotation exercises.
Visible abdominal definition also depends on overall body composition, nutrition, genetics, and your complete training routine.
Does the Copenhagen Plank Work the Inner Thighs?
Yes. The inner thigh or adductor muscles are among the main muscles challenged during the Copenhagen plank. The supported leg has to create tension against the bench while your body remains elevated.
This makes the movement different from a traditional side plank, which places more emphasis on lateral core stability.
How Long Should a Beginner Hold a Copenhagen Plank?
A beginner can start with approximately 10 to 15 seconds per side. The exact duration should depend on your ability to maintain proper form.
If your hips begin to drop, your torso rotates, or you cannot breathe comfortably, end the set. Over time, you can gradually increase the hold duration.
Can You Do Copenhagen Planks Every Day?
You generally do not need to perform Copenhagen planks every day. Two or three sessions per week can provide enough practice for many people.
The inner thighs may need recovery after challenging sessions, especially when you are new to this exercise. Allow your body to recover before increasing the training volume.
Copenhagen Plank Alternatives
If you do not have a suitable bench or find the Copenhagen plank too challenging, several exercises can train similar areas.
Side-Lying Leg Raise
Side-lying leg raises can target the muscles around the hips while requiring less upper-body strength than a Copenhagen plank.
Adductor Side-Lying Exercise
A side-lying adductor exercise allows you to specifically train the inner thigh by lifting the lower leg. It is a simple bodyweight option for beginners.
Side Plank
A traditional side plank is an excellent starting point for developing lateral core strength before progressing to the Copenhagen variation.
Standing Hip Adduction
Standing hip adduction can be performed with bodyweight, resistance bands, or cable equipment. It provides another way to strengthen the inner thigh muscles.
Ball Squeeze
A soft exercise ball or similar object can be placed between the knees for gentle adductor activation. This is a much easier movement than the Copenhagen plank.
Copenhagen Plank for Home Workouts
You do not need a full gym to include this exercise in your routine. A sturdy bench, sofa edge, or stable elevated platform may provide support, provided it is safe and does not move.
Before exercising at home, check that the surface is stable and that you have enough open space around you. A yoga mat can also provide additional comfort for the supporting elbow or hand.
Simple Home Core Routine
- Modified Copenhagen plank: 2 sets per side
- Front plank: 2 sets
- Dead bug: 2 sets per side
- Glute bridge: 2 sets of 12 repetitions
- Bird dog: 2 sets per side
Perform each movement slowly and focus on technique. Rest when needed rather than rushing from one exercise to the next.
Copenhagen Plank for Runners
Runners place repeated demands on their hips, legs, and trunk. Adding strength exercises can complement running by developing muscles that contribute to stability and control.
The Copenhagen plank provides a focused challenge for the adductors while also training lateral core stability. This can make it a useful accessory exercise in a runner’s strength routine.
However, it should not replace running-specific training. A complete program should also include appropriate running volume, recovery, lower-body strength, and mobility work.
Copenhagen Plank for Soccer and Field Sports
Field sports often require rapid acceleration, deceleration, cutting, and lateral movement. These actions place demands on the muscles around the hips and thighs.
Including adductor exercises in a broader strength program can help athletes develop better muscular capacity. Copenhagen planks can be one part of that program.
Athletes should also train squatting, lunging, jumping, sprinting, balance, and change-of-direction skills according to their sport and training level.
How to Combine Copenhagen Planks With Leg Training
You can pair Copenhagen planks with common lower-body exercises to create a balanced session.
Example Lower-Body Workout
- Bodyweight or weighted squat: 3 sets of 8–12 repetitions
- Reverse lunge: 3 sets of 8–10 repetitions per leg
- Romanian deadlift: 3 sets of 8–12 repetitions
- Glute bridge: 3 sets of 10–15 repetitions
- Copenhagen plank: 2–3 sets per side
- Calf raise: 3 sets of 12–15 repetitions
This type of routine trains several major lower-body muscle groups while giving the adductors additional focused work.
Recovery After Copenhagen Planks
Recovery is an important part of getting stronger. Your muscles adapt between training sessions, not only while you are exercising.
After a challenging Copenhagen plank session, allow enough time before repeating a high-intensity adductor workout. Light walking and normal daily movement can help you stay active without adding excessive training stress.
Prioritize Sleep
Quality sleep supports physical recovery and helps you perform better during future workouts. Aim for a consistent sleep routine whenever possible.
Eat a Balanced Diet
A balanced diet containing adequate protein, carbohydrates, healthy fats, vitamins, and minerals supports general fitness and recovery.
Do Not Ignore Persistent Pain
Normal muscular fatigue is different from sharp or persistent pain. If an exercise repeatedly causes pain, stop and consider getting advice from a qualified healthcare or fitness professional.
Tips for Better Copenhagen Plank Results
Focus on Quality
Do not sacrifice your body position simply to increase the number of seconds. Strong technique should remain your priority.
Progress Slowly
Increase one training variable at a time. You might first increase hold duration and later move to a more difficult variation.
Train Both Sides Equally
Perform similar sets and durations on both sides. If one side is noticeably weaker, avoid adding excessive volume to compensate without a clear training plan.
Use Controlled Breathing
Steady breathing can help you remain relaxed and maintain control during an isometric hold.
Keep Your Core Braced
Think about gently tightening your abdominal muscles while keeping your pelvis stable. Avoid excessive tension throughout the body.
Who Should Be Careful With Copenhagen Planks?
Although the exercise can be useful, it is not appropriate for everyone at every stage. People with current injuries, significant pain, or movement limitations should seek individualized guidance before adding demanding adductor exercises.
If you have recently experienced an injury involving the hip, groin, knee, or lower body, speak with an appropriately qualified healthcare professional before progressing to challenging variations.
The safest approach is to choose a variation that matches your current ability and increase the difficulty gradually.
Frequently Asked Questions
1. What muscles does the Copenhagen plank work?
The Copenhagen plank mainly targets the adductor or inner-thigh muscles. It also works the obliques, abdominal muscles, glutes, hip stabilizers, shoulders, and other muscles that help maintain body alignment.
2. Is the Copenhagen plank better than a regular side plank?
Neither exercise is universally better. A side plank focuses strongly on lateral core stability, while the Copenhagen plank adds a greater inner-thigh challenge. You can use both exercises in a balanced program.
3. How many sets of Copenhagen planks should I do?
Two to three sets per side are a practical starting point for many people. Beginners can use shorter holds, while stronger individuals can gradually increase the duration or choose a harder variation.
4. Why is the Copenhagen plank so difficult?
The exercise combines lateral core stability with a strong demand on the adductor muscles. If you are not accustomed to training your inner thighs in this position, the movement can feel difficult at first.
5. Can I do Copenhagen planks at home?
Yes. You need a stable elevated surface that can safely support your leg. Always check that the surface will not slide, tip, or move during the exercise.
Conclusion
The Copenhagen plank exercise is an effective bodyweight movement for developing inner-thigh strength, core stability, and hip control. Its different variations make it possible to adjust the challenge for beginners, intermediate trainees, and advanced athletes. Start with a supported variation, learn the correct position, and increase the difficulty gradually. Keep your hips elevated, maintain a straight body line, breathe normally, and train both sides evenly. The exercise works best when combined with other core and lower-body movements rather than used alone. With consistent practice and proper technique, the Copenhagen plank can become a useful addition to a balanced strength, fitness, or athletic conditioning program.


Leave a Reply